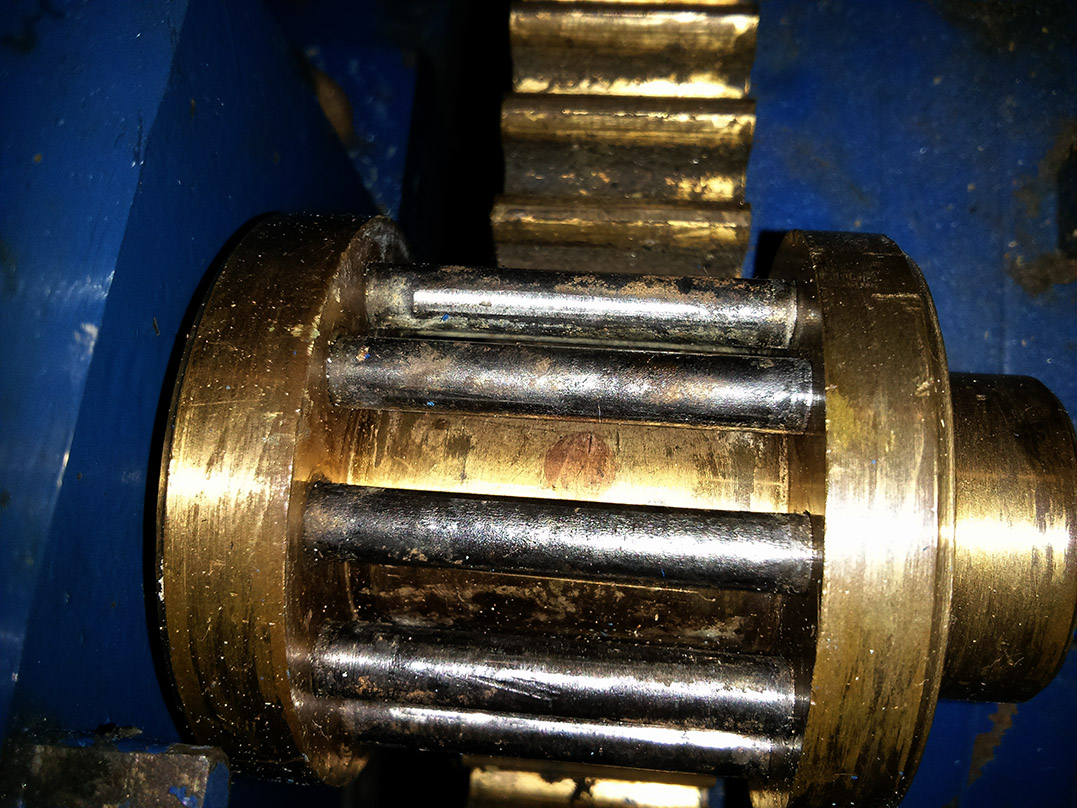
In order to faithfully reproduce the original parts we needed to work out how they were actually made. This took a bit of time to work out for the lantern pinions. On initial inspection it wasn’t obvious how they were attached to the arbours, but this turned out to be because they were so dirty and the original fixing was so neat. When we got one cleaned up we finally found a bronze pin in the centre of the pinion. This appeared to have been machined smooth and so blended in really well (hence any dirt, or insufficient light in the workshop, and it was invisible). It shows clearly it the image, but that’s zoomed in, taken with bright flash and I’ve tweaked the colours too so it’s easier to see than looking at the real thing.
However, this pin is beneath the trundles (the pins along the pinions, which engage with the teeth of next wheel in the train) which must have been inserted afterwards, yet the pinions ends aren’t open! This suggested it was made as two separate ends and the trundles sandwiched between them, but then you’d need two pins to hold the ends to the arbour. Only after closer inspection of another lantern pinion on the clock did my Father spot that there were end caps on the pinions. They are basically very well fitting brass washers pushed on to the end to cover the holes containing the trundles (at first we thought they might be soldered on, but apparently they are just pushed on). They are then machined to a perfect fit with a bevelled edge that masks the joint line. On one of the larger pinions there is a small gap where the hole in the washer isn’t a perfect fit around the arbour which gave it away. The result is really neat and serves to emphasise the quality of the original clock.