Category Archives: Electronics

Allowing map modifications on Nissan Connect

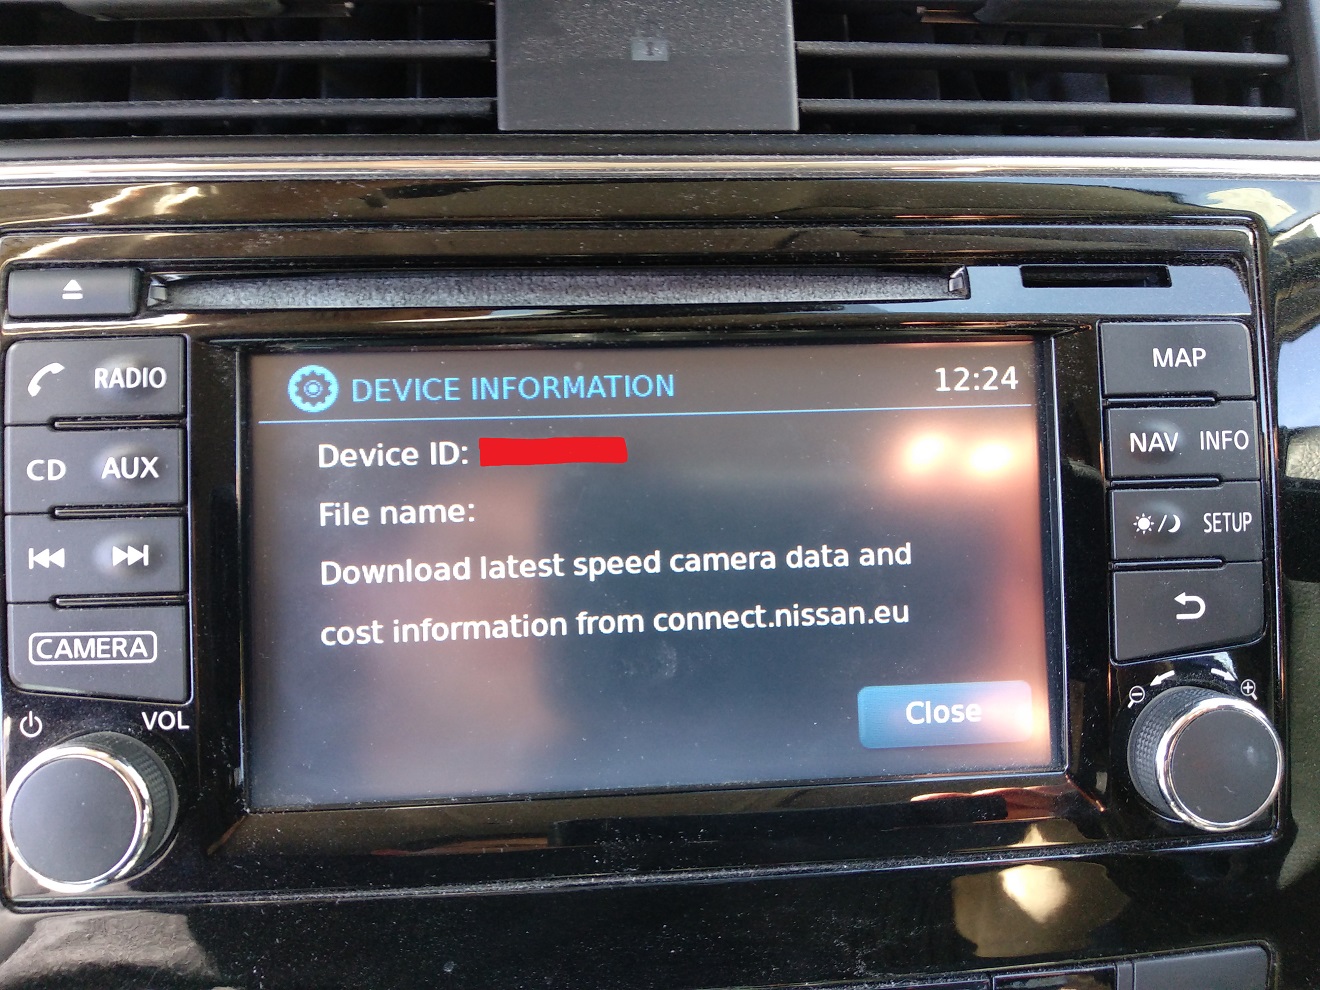
The maps on the Nissan Connect aren’t great, if you look at the metadata on the sd card the actual data used in the latest version is always at least a year old. Another personal annoyance is that the maps think the speed limit on several roads around my house is 20mph, which is not true and never has been. I have over-speed warning turned on, so I get lots of annoying and incorrect warnings when driving near the house. I have no expectation that this will ever get fixed in the maps officially, so I started to wonder about fixing it myself.

Having looked at files on the sd card I’m not convinced that’s going to be very likely, unless there are some tools out there on the internet but a quick google hasn’t found anything. Possibly no one has made any effort to understand the maps because if you edit them they probably work on the system – the contents of the sd card appear to be signed. The file cryptnav/data/data/misc/sdx_meta.dat contains a list of files that are hashed (or in some cases just the first 2kb of them) and signed. These files look like they’re probably key to the rest of the map data, so it’s likely any change to the map data will break the signature. A file of md5 checksums for the nav application update files is also included in the hash list, to ensure they aren’t modified either.

Other interesting things of note in sdx_meta.dat is a start date (seems unnecessary) and an end date (happily this is blank so they don’t expire). Guessing from the acronyms, it also looks like there’s the option to tie the contents to an sd card (via cid) or to a specific vehicle (by vin), again these are both blank values so not currently in use.

In order to edit the maps we either need to sign the edited version (not possible without the private key) or bypass the signature check. The latter is easy. The signature is ultimately verified by the function BPCL_EC_DSA_Verify in /opt/bosch/processes/libosal_linux_so.so and the return code can simply be patched so it always returns 0 (success).

If you want to play with map modifications (please do, I want to know how to fix my local speed limits!) I have added a script to my lcn-patcher tool to modify libosal_linux_so.so for you. The patch will need to be tailored for each version of the library, as it will have been re-compiled with each version of the firmware. The patch currently works with firmware versions F16A, D554 and D605, and uses md5 to check the file before modification (it also makes a backup and there is a script to restore the backup). For unknown versions, it will copy it to the sd card so it can be analysed for patching. As always, you modify your head unit at your own risk!

Update: See here from some initial work on understanding the map data formats.

Removing Alerts_0913.ntq from Nissan Connect

Shows Alerts_0913.ntq removed from device.

Following on from my previous post, I quickly found one useful thing that root access gets us. It allows us to remove the built-in speed camera data. This is good for two reasons: 1) it’s from 2013 so some of it is out of date 2) if you add your own speed camera database you get duplicate warnings. The old camera database comes with the head unit firmware, not the maps sd card, in a file called Alerts_0913.ntq. You can see this filename if you go through the menus to look at myPOI settings. You cannot normally remove this database, and the only way to update it was to replace it with a newer copy purchased from Nissan. With no way to remove these they become increasingly out of date and inconvenient, which is probably a deliberate tactic to get you to pay for the update. Only now they don’t even sell the update, so you’re stuck with 8 year old speed camera data! You can install a third party database of speed cameras, but then you get duplicate alerts where they appear in both.

Removing the old set of alerts is as simple as removing the folder /var/opt/bosch/dynamic/ffs/myPOIs (and its contents), using root access over ssh. If you’re not familiar with Linux, don’t have a laptop, don’t want to order a usb network adapter from china (wait weeks, and then maybe find it’s not the right type when it arrives), etc. then you need a simpler way. So I’ve written a little script that uses the technique from ea to produce a usb stick image that will do it for you. You just plug in the stick and it does the job, wait for the reboot, remove the stick during the boot up Nissan logo (if you don’t remove the stick it’ll keep doing it and keep rebooting) and you’re done.

The code to create the image is on GitHub. I’ve written it as a tool that can create an image based on one or more included scripts. So far the scripts include a test script (to see if your device is compatible with the method used to gain access), a script to enable sshd and a script to remove the built in POIs (note it will also remove any custom ones, but you can put these back on afterwards of course). Sadly you will need a Linux system to create the image, but once created you can share them and write them in Windows so ask a friend if you don’t have one.

Update – bit more info on the internal POIs. The ntq files that you used to be able to purchase from Nissan were encrypted, and in some way tied to the device (that’s why a device ID is displayed on the screen where it tells you the name of the built in file). When you install them from a usb stick they are decrypted and copied to the internal filesystem at /var/opt/bosch/dynamic/ffs/myPOIs/myPOIWarnings. The file retains it’s ntq extension, despite no longer being encrypted, and is now just a csv file. The ntq extension ensures that it will not get deleted when you choose to delete POIs from the menu. Along side the ntq file is a file called DInfoCW.dat which is also a csv file, containing: Alerts_0913.ntq,953088,8,37,15,16,9,2013
Which appears to be: filename, filesize (of the ntq file), time and date. Filesize is off by a few bytes, but I suspect that’s an error in the file.

When you add your own csv file of camera locations the csv is copied to the same location as the ntq, and a file is created alongside it called DirInfo.dat with the same format as DInfoCW.dat (the filesize it contains is exactly that of the csv file). Another identical is also created in the folder above (/var/opt/bosch/dynamic/ffs/myPOIs).

Also in /var/opt/bosch/dynamic/ffs/myPOIs is the file completequadtree.dat which contains all the POIs in some more efficient binary format. This is regenerated when you install a new csv/ntq file or when you delete your custom POIs (assuming you have the built-in ntq, if you don’t then the file and the folder containing it is removed completely).

Playing with Nissan Connect

A few weeks ago I found an article on Hackaday reporting ea‘s success in getting root access to a Nissan Connect LCN2kai sat nav head unit. I have one of these in my Nissan Pulsar, and my wife has an older version (LCN1) in her Qashqai, and I’ve always fancied playing with them but never had the time (or wanted to risking break it! – ea bought a spare to play with). Now someone else has done the hard work and got access, it prompted me to have play. The question is – what can I to do with it now? Very often the answer to that is ‘nothing useful’, but at least there’s some fun to be had in the playing.

Anyway, from initial playing I found a few interesting things which aren’t mentioned in the original write-up:

  • The system starts in runlevel 4.
  • The device comes with developer scripts, and can be switched into development mode. This enables sshd and I think enables a serial terminal. There is also a script to mount /opt/bosch over NFS (presumably for testing new builds).
  • Most of the user applications are not updatable, without a complete firmware update of the unit. The satnav application is the exception – it is symlinked to a writeable partition and can be updated by a newer version shipped on the maps sd card.
  • Most of the programs in /bin are provided by busybox, but there are more utilities compiled in to busybox than are symlinked. E.g. md5sum is provided in /usr/bin so you don’t have access while using the mount trick (which has mounted over /usr/bin). This is unfortunate if you want to create an easy way for users to modify their system just via usb stick, as you’d probably want to use md5sum to check files on the system before modifying them to avoid breaking an incompatible system. Luckily, busybox also provides md5sum. As there is no symlink in /bin you need to call /bin/busybox md5sum <file> instead.
  • The system is quite happy to use a usb hub, so you can connect a usb stick and network adapter at the same time. This means you can image the filesystem for offline research. At ~900mb for the system partition, it took half an hour to dd it to a usb stick and required the engine running to keep the unit powered on that long. On the other hand, if you download a system update you can access the complete filesystem there which is a lot less effort. In fact, looking at how ea worked out how to exploit the mounting of a usb stick to get root access to the system, this could have been worked out entirely from examining the firmware update without any need to get serial access to the device itself!

Honeywell Galaxy Ethernet Adapter RS485 Protocol

This is a belated follow-up to my previous posts, this time about the Honeywell Galaxy RS485 protocol, covering the Ethernet adapter. The adapter normally provides reports to an Alarm Receiving Centre (ARC). It can also be used to configure the alarm panel through Honeywell software. It does not, as far as I know, provide any direct interface to the alarm to allow it to be set/unset/etc. Devices like the LCE-01 provide this via a virtual keypad interface, by emulating a keypad on the RS485 bus (i.e. it does not interact with the panel through the normal panel<->ethernet interface, but instead through the panel<->keypad interface).
Continue reading Honeywell Galaxy Ethernet Adapter RS485 Protocol

Honeywell Galaxy Keypad (CP038) RS485 Protocol

The KeyProx model contains two logical devices, the keypad itself and the RFID reader. Logically these appear to be completely independent, though a quick look in the case confirms there is only really one device as you’d expect. This means the keypad information will be the same for a non-prox model. The prox part will probably be the same for the separate max3/4 RFID reader but I don’t have one of those to compare against.

The device ID is set using the rotary selection switch on the PCB. Although it has 16 positions only 0-3 are valid for keypad ID. Positions 0/1/2/3 correspond to RS485 bus IDs of 10/20/30/40 respectively for the Keypads and 90/91/92/93 for the associated prox readers. A strange pair of numeric sequences. You’ll also note from the startup polling sequence in my previous post that the prox readers are polled separately from the keypads and in reverse order. I’ll just deal with the keypad in this post, as I haven’t played with the prox reader much.

When the keypad is powered on it will beep and flash until it starts to receive commands. Once running, if it does not receive a command within a certain amount of time (e.g. lost contact with panel) it will revert to this beeping state.
Continue reading Honeywell Galaxy Keypad (CP038) RS485 Protocol

Honeywell Galaxy G2 RS485 Bus

I always fancied adding Ethernet to my home Alarm system, even though I don’t have any particular use for it. I live in a pretty safe area and it rarely has false alarms or anything else I really need to monitor. Besides, if you’re at work, miles from home and in the middle of something, what what are you going to do if you get a notification that your house alarm has gone off?

Eventually, by chance, I picked up a second hand official Ethernet adapter for the alarm at a car boot sale, but it turned out the firmware was too old and the cable to update it is surprisingly expensive, and the update itself not publicly available anyway. I was already aware of the LCE-01 from SM Security Alarms as a cheaper alternative, with more functions like a Virtual Key Pad app, but £66 for a device I didn’t really have a use for was still a bit steep for someone who hates to part with money. I contacted the maker to find out about updating the firmware on mine and he offered me a good deal on a part exchange so I went for it.
Continue reading Honeywell Galaxy G2 RS485 Bus

CID change on SD card update (evoplus_cid)

IMG_20160731_172654

My recent post on how to change the CID on a Samsung Evo Plus SD card has generated some interest, but also a number of people who are having problems with it. I thought it was worth posting an update with some extra information. First off, I suspect some people who are struggling have fake cards – there are a lot out there and some of them look pretty convincing. Others have suggested different hardware / firmware revisions might be an issue – quite possible but I have no way of knowing (all my Evo Plus cards work, so I can’t can’t compare against ones that don’t). I can see no reason why different phones etc. would give different results – as long as it’s a proper SD controller (not a USB mass storage adapter) then sending the command should work just fine.

Fake cards
These are very common and if you google for fake Samsung cards you’ll find lots of info on how to spot them. A few tip I’ve picked up along the way:

  • Packaging quality – the image should be well printed, in high resolution and good bit depth on the colours (some fakes looks like they’ve been converted down to 256 colours). The gloss overlay over the printed areas should align with the printing below them, if it’s offset that’s a bad sign.
  • Packaging info – the product information should be correct and match the card. I had one fake that incorrectly stated a 32gb card was SDXC on the pack instead of SDHC, the card itself had SDHC printed on it. The correct size should also be printed on the packet. Look up the UPC from the barcode on the back and make sure that matches the product and size of your card.
  • Hologram, with scratch-to-reveal verification code. The real ones have them (recent ones at least), fakes might but probably don’t. All of mine have, but oddly enough when I tried to check one on the Samsung China website I didn’t get anywhere with the verification code, the site was in Chinese though so I might have been doing something wrong.
  • The card – lots of subtle details to check. Smooth back, not lumpy showing circuit parts beneath the surface. Black on the back, white on the edges. Slight bevel on the contact side, to help insertion. Correct info printed on the card. Correct font, especially for the capacity digits, some fakes don’t use the correct slim font. Text on the back is printed so it is read with the card contacts end pointing upward. Mine are made in the Philippines but this is probably not the only place so don’t get hung up on this.
  • Card CID – check it and compare to working ones. See below…

Card CID
An example of the CID on one of my cards: 1b 534d 3030303030 10 98625deb 0102 a1. Your card CID should be very similar. The manufacturer ID should be 1b, followed by an application/OEM ID of 534d. The product name is 3030303030 (5 x ASCII ‘0’). The product revision is 10 (1.0). The next 8 hex characters (98625deb) are the SD card serial number, yours will be different! The manufacturing date is next (0102, or 0 10 2), where the first digit is ignored, the next pair is the year in hex since 2000 and the last digit is the month in hex. So this is February (2) 2016 (2000 + 0x10). I also have March 2016 (0103) cards that work fine. Last is the checksum (a1) which will be different on your card. I doubt many of the fakes have properly set Samsung CIDs so hopefully this is an easy way to tell.

My cards / System
Samsung Evo Plus 32gb. UPC: 8806086928410. Model: MB-MC32D. Model code: MB-MC32D/CN. Purchased from this listing on AliExpress. I am not affiliated with the seller and get no referral commission from this link. I also cannot guarantee that you’ll get working or even genuine cards, but I have purchased on two occasions from this seller and the cards have been genuine and worked with evoplus_cid.

I have used evoplus_cid on a Samsung Galaxy Tab 2 (10 inch, wifi model, p5110). The tablet is running CyanogenMod 13 unofficial from here.

evoplus_cid
I’ve made a couple of updates to evoplus_cid. If you supply a full 32 digit CID (and don’t apply a serial number modifier) it will be written as is without recalculation of the checksum. This was requested by a user for cards that apparently always had a checksum of 00. Although, I’ve got a laptop that always displays 00 for the checksum when showing the CID, so I wonder now if his cards really did need that! I’ve fixed a bug when compiling on 64bit Linux that could prevent the CID being written. I’ve also fixed a bug causing the displayed CID to include some extra ‘FF’s.

Pictures

Changing the CID on an SD card – Working!

(tl;dr – skip to bottom for instructions, see also update post) The CID register on SD cards is supposed to be read-only, which means it can be used to lock devices to specific SD cards, preventing the user swapping them out, which is very annoying. This can result in you being stuck with a smaller card than you’d like in a device or not being able to use a backup in case of damage.

I’ve spent a while trying to work out how to change the ID on some cards. There is surprisingly little info out there about this, when it’s easy for other devices. For example, if you want to change the supposedly read-only ID on various kinds of RFID tag you can simply buy a special version from China that allows it (often referred to as gold or magic cards). There are rumours of cheap Chinese SD cards that don’t follow the official spec and allow you to change to them – I now have  large pile of cheap Chinese SD cards on my desk, but unfortunately none of them did allow it. The spec includes a command (CMD26) for writing the CID, but it’s only supposed to work once in the factory when the card is first assigned an ID. All the cards I got seemed to honour that restriction. However, there is probably some way to unlock them…

If you’ve found this page by looking for help on this topic you’ve probably already seen Bunnie Huang’s SD card hacking presentation, unfortunately I wasn’t able to track down any APPO AX211 based cards, which I thought would be my best bet.

In that presentation was mention of vendor commands for a Samsung eMMC used as the built-in storage on an Android phone. I’m not well enough versed on the technology to know quite what the difference between eMMC and SD cards are, aside from the way SD cards are packaged of course – although that might be all there is to it. Reading around they seem work in the same way and appear the same within Linux. Then I stumbled upon SamDunk, where Sean Beaupre had managed to unlock a Samsung phone (to developer mode) by reverse engineering some of the eMMC firmware on his device and finding commands that allowed the CID to be unlocked and rewritten.

So I started buying Samsung SD cards, hoping for one with the same moviNAND core as the eMMC in their phones. I now also have a stack of Samsung SD cards on my desk, but with the last different one I found I struck gold! (Collecting Samsung cards is more expensive than cheap Chinese ones and it takes some effort to avoid getting fakes.) The Samsung EVO Plus 32GB MicroSDHC card took the commands from SamDunk and let me change the CID.

I have taken the SamDunk code and reworked it a little to make it easier to use for SD cards, but all the credit really needs to go to the original author. To use you simply need a rooted Android device with an SD card slot. Copy the evoplus_cid binary to the device and put it somewhere with a proper Linux file system (not FAT), then apply execute permission to it. Run the tool and point it to the SD card device e.g. /dev/block/mmcblk1 (you almost certainly do not want to use mmcblk0, that is likely to be the built-in storage on your device). List the /dev/block folder and make sure the device you going to use appears and disappears as you insert and remove the SD card to be sure. Supply the new CID you want to set on the command line. If you only need to change the card serial number (part of the CID) you can supply the old CID and the new serial number and the new CID will be calculated for you. I suggest you make a note of the old CID first, in case you want to set it back later. This can be found in the file like /sys/class/mmc_host/mmc1/mmc1:0001/cid, but the path may vary, and again make sure you are looking at the right card by checking it disappears when you remove the card.

You can find the code here: https://github.com/raburton/evoplus_cid (compiled binary is in the lib folder). Use entirely at your own risk. Use only against genuine Samsung Evo Plus cards, anything else is unlikely to work and could be damaged. Even the right card could potentially be damaged!

To set a new completely new CID:

# Usage: ./evoplus_cid &lt;device&gt; &lt;new cid&gt;
./evoplus_cid /dev/block/mmcblk1 744a454e2f412020106c6d77470104c3

Or to just change the serial number part of the current CID:

# Usage: ./evoplus_cid &lt;device&gt; &lt;currentcid&gt; &lt;new serial&gt;
./evoplus_cid /dev/block/mmcblk1 1b534d30303030301098625deb0102a1 12345678

Flash write bug fix

Looks like I finally have a fix for the flash write issue, thanks to some help from Espressif. Embarrassingly it turns out to be my fault, but I’m not too proud to admit that. So what was the problem? Since SDK v1.5.1 people have been reporting intermittent failed OTA updates and I’ve been able to reproduce it easily myself. This only seemed to occur when using wifi for long sustained writes.

So what was happening? Occasionally the network receive would get a much larger packet than normal. In my latest testing they are usually around 1436 bytes, but occasionally one would arrive that was 5744 (this is the only large value I have seen myself, but presumably other values could occur). The flash is erased in 4k sectors and the rBoot code erases them as required, checking if the current data block will fit in the current sector and if not erasing the next one too. Where I went wrong was to assume that a receive would always be less than the 4k sector size, having never seen one before SDK v1.5.1 that was anywhere near that large. When one of these very large packets arrives it could span 3 sectors. The second sector would get erased correctly but the third sector would not. The flash write command would not return an error when it tried to write to the non-erased sector, so no fault was noticed at this time. Then on the next write that third sector, now being the first sector for that next write, gets erased and the new data written part way through it (where it should be).

Moral of the story. Don’t make assumptions and don’t ignore the edges cases – I’m usually pretty good at this second point, but occasionally I seem to need reminding. In this case I had thought about it and added code that detected a chunk over 4k that would need more erasing. As I didn’t think this could ever happen I merely put a comment in the if statement to say what would need to be done in that scenario, if I’d thrown an error at that point instead this problem would have been easily diagnosed. However, I did also assume that the flash write would fail if it tried to write to flash that was not erased, so I expected to see an error of some kind.

Why did it suddenly happen at v1.5.1? I don’t know that but presumably Espressif made some change in the SDK that makes this more likely to occur. While playing with some code for Pete Scargill I did manage to reproduce the problem with v1.4.0 so it wasn’t impossible for it to happen there, but I never had any reports of it there previously. I also found that the timers in Pete’s code made it more likely to happen in my testing, so I suspect the extra processing these caused was impacting the performance of the network stack and causing more packets to be bunched together and delivered as larger chunks to the application. Further testing showed RF interference could also cause the same result.

The fix is available in the rBoot GitHub repo, and has also been updated in Sming.

Flash write bug in Espressif SDK v1.5.1+

Users of rBoot have reported OTA problems when using Espressif SDK v1.5.1 which I have been able to reproduce on this version and v1.5.2. The problem appears to be in the sdk flash write functions. While most writes work fine some will occasional fails to fully write (leaving small areas of blank data (0xff)). To make matters worse no error is reported from the write function and attempts to read the flash back for verification immediately afterwards return the correct data (presumably they are serviced by the rom cache). This is very similar to the problem seen when trying to perform an OTA with insufficient power. I once had a similar report from a user using just a 100mA power supply and the problem was fixed by using a proper power supply. This makes me wonder if the new SDK causes the device to draw more power, although supplying extra power does not fix the problem in this case.

I have created a test case that doesn’t use rBoot but simply downloads a file and writes it to flash (which is of course very similar to what rBoot does) to demonstrate the problem to Espressif. I have yet to hear back from them. If you encounter this problem please add your support to my bug report. I have no reason to believe this bug will be limited to rBoot users and I assume SDK bootloader users and anyone else writing to the flash from an application (possibly only in long sustained writes) will also have this problem.

This is a good opportunity to encourage rBoot users to enable the irom checksum option, to help detect badly flashed roms at boot time. See the readme for more information.